https://www.sslshopper.com/article-installing-an-ssl-certificate-in-windows-server-2008-iis-7.0.html
Windows Server 2008 includes Internet Information Services (IIS) 7.0. This new version makes several big changes in the way that SSL certificates are generated, making it much easier than previous versions of IIS. In addition to the new method of requesting and installing SSL certificates, IIS 7 includes the ability to:
- Request more than one SSL certificate at a time
- Import, export, and renew SSL certificates easily in IIS
- Quickly create a self-signed certificate for testing
This article will walk you through the process of ordering an SSL certificate from a commercial certificate authority and installing it on an IIS 7 Windows Server 2008 machine. The process will also work for later versions such as Windows Server 2016 and IIS 8 and IIS 10 with some small modifications.
Create the Certificate Signing Request
The first step in ordering an SSL certificate is generating a Certificate Signing Request. This is very easy to do in IIS7 using the following instructions. Click here to hide or show the images
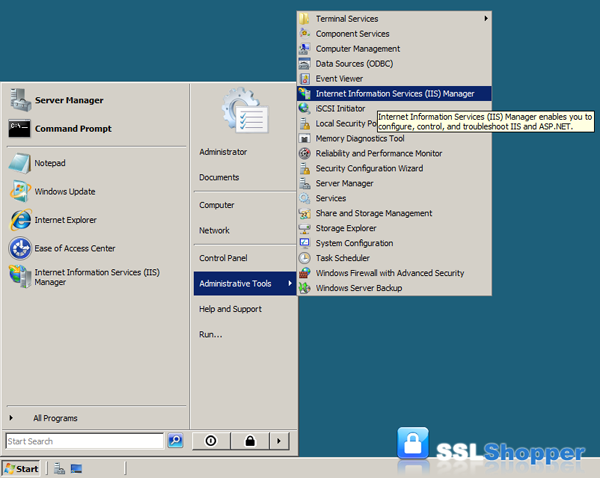
- Click on the Start menu, go to Administrative Tools, and click on Internet Information Services (IIS) Manager.
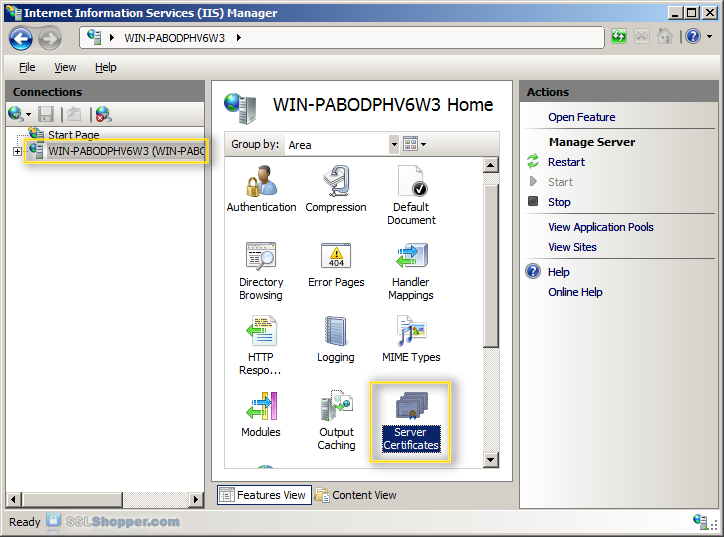
- Click on the name of the server in the Connections column on the left. Double-click on Server Certificates.
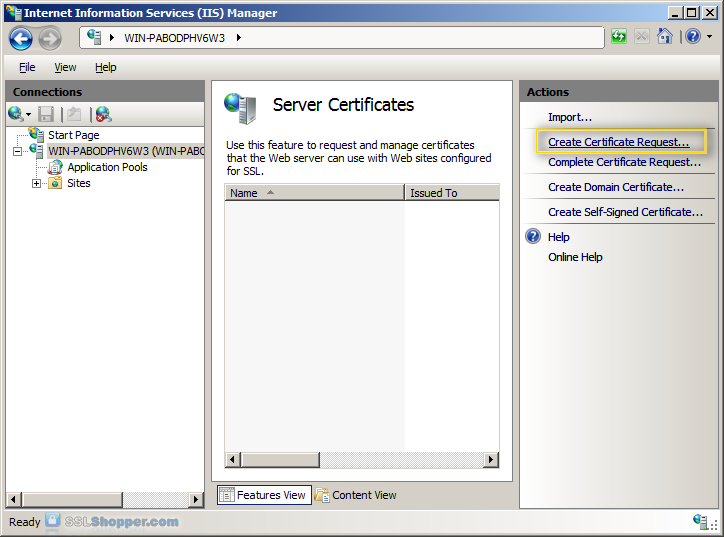
- In the Actions column on the right, click on Create Certificate Request...
- Enter all of the following information about your company and the domain you are securing and then click Next.
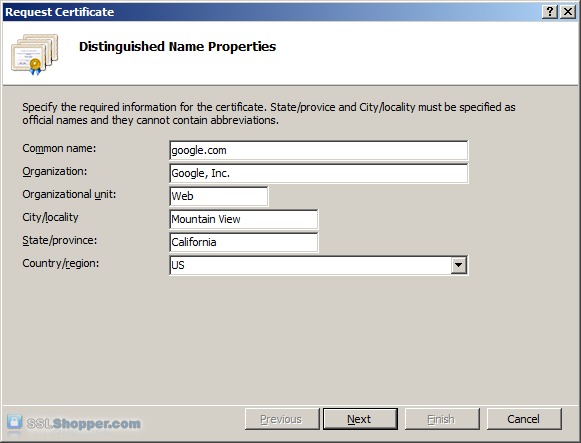
Name Explanation Examples Common Name The fully qualified domain name (FQDN) of your server. This must match exactly what you type in your web browser or you will receive a name mismatch error. *.google.com
mail.google.comOrganization The legal name of your organization. This should not be abbreviated and should include suffixes such as Inc, Corp, or LLC. Google Inc. Organizational Unit The division of your organization handling the certificate. (Most CAs don't validate this field) IT
WebCity/Locality The city where your organization is located. Mountain View State/province The state/region where your organization is located. This shouldn't be abbreviated. California Country/Region The two-letter ISO code for the country where your organization is location. US
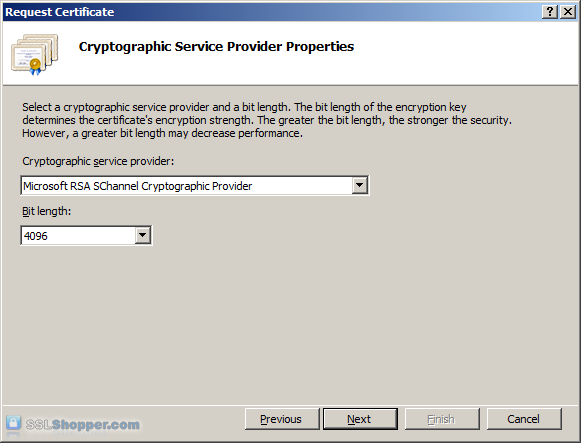
GB - Leave the default Cryptographic Service Provider. Increase the Bit length to 2048 bit or higher. Click Next.
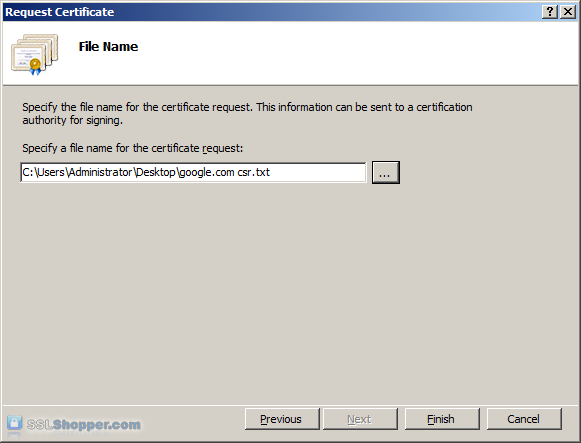
- Click the button with the three dots and enter a location and filename where you want to save the CSR file. Click Finish.
Once you have generated a CSR you can use it to order the certificate from a certificate authority. If you don't already have a favorite, you can compare SSL features from each provider using our SSL Wizard or by comparing cheap SSL certificates, Wildcard Certificates, or EV certificates. Once you paste the contents of the CSR and complete the ordering process, your order is validated, and you will receive the SSL certificate file.
Install the Certificate
To install your newly acquired SSL certificate in IIS 7, first copy the file somewhere on the server and then follow these instructions:
- Click on the Start menu, go to Administrative Tools, and click on Internet Information Services (IIS) Manager.
- Click on the name of the server in the Connections column on the left. Double-click on Server Certificates.
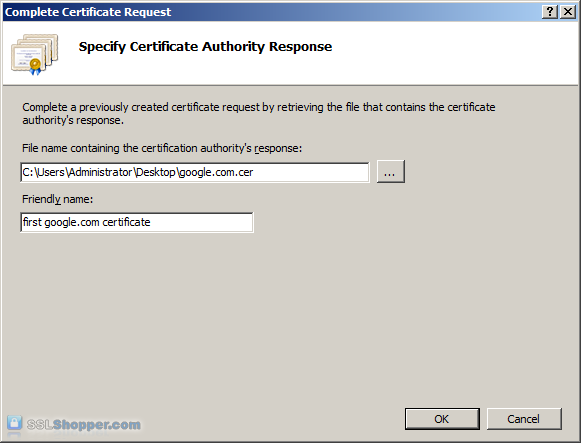
- In the Actions column on the right, click on Complete Certificate Request...

- Click the button with the three dots and select the server certificate that you received from the certificate authority. If the certificate doesn't have a .cer file extension, select to view all types. Enter any friendly name you want so you can keep track of the certificate on this server. Click OK.
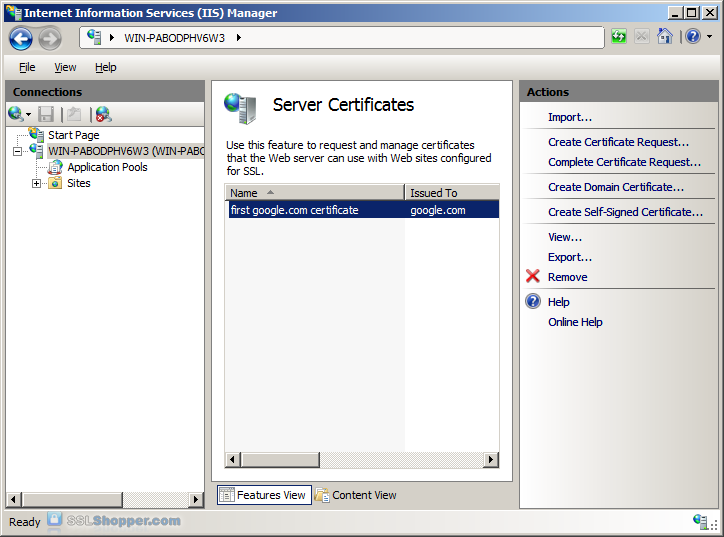
- If successful, you will see your newly installed certificate in the list. If you receive an error stating that the request or private key cannot be found, make sure you are using the correct certificate and that you are installing it to the same server that you generated the CSR on. If you are sure of those two things, you may just need to create a new Certificate Request and reissue/replace the certificate. Contact your certificate authority if you have problems with this.
Bind the Certificate to a website
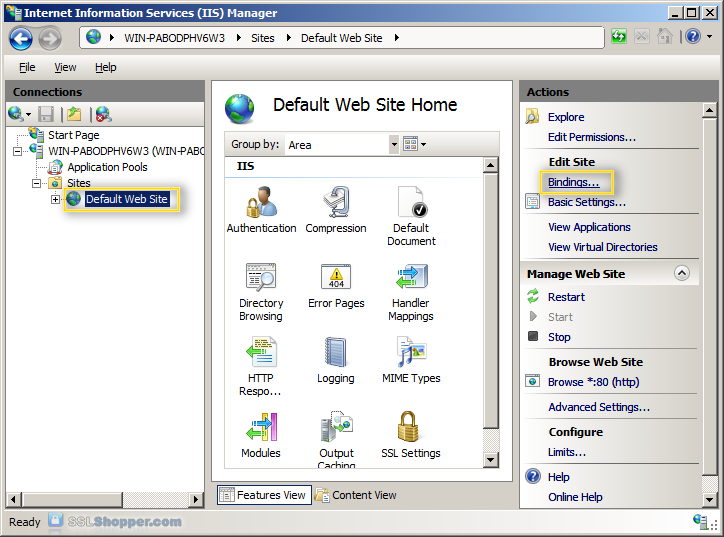
- In the Connections column on the left, expand the sites folder and click on the website that you want to bind the certificate to. Click on Bindings...in the right column.
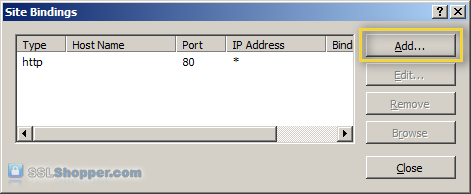
- Click on the Add...button.
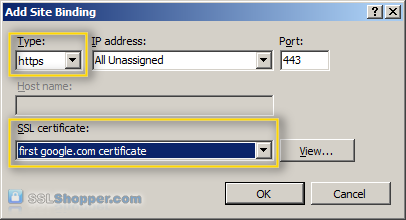
- Change the Type to https and then select the SSL certificate that you just installed. Click OK.
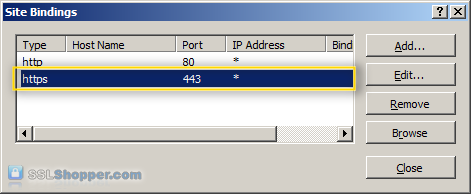
- You will now see the binding for port 443 listed. Click Close.
Install any Intermediate Certificates
Most SSL providers issue server certificates off of an Intermediate certificate so you will need to install this Intermediate certificate to the server as well or your visitors will receive a Certificate Not Trusted Error. You can install each Intermediate certificate (sometimes there is more than one) using these instructions:
- Download the intermediate certificate to a folder on the server.
- Double click the certificate to open the certificate details.
- At the bottom of the General tab, click the Install Certificate button to start the certificate import wizard. Click Next.
- Select Place all certificates in the following store and click Browse.
- Check the Show physical stores checkbox, then expand the Intermediate Certification Authorities folder, select the Local Computer folder beneath it. Click OK. Click Next, then Finishto finish installing the intermediate certificate.
You may need to restart IIS so that it starts giving out the new certificate. You can verify that the certificate is installed correctly by visiting the site in your web browser using https instead of http or using our SSL Checker.


