Showing posts with label git. Show all posts

22 August 2023

How to Run Your Own Git Server

https://www.linuxfoundation.org/blog/blog/classic-sysadmin-how-to-run-your-own-git-server


This is a classic article written by Swapnil Bhartiya from the Linux.com archives. For more great SysAdmin tips and techniques check out our free intro to Linux course.

Git is a versioning system developed by Linus Torvalds, that is used by millions of users around the globe. Companies like GitHub offer code hosting services based on Git. According to reports, GitHub, a code hosting site, is the world’s largest code hosting service. The company claims that there are 9.2M people collaborating right now across 21.8M repositories on GitHub. Big companies are now moving to GitHub. Even Google, the search engine giant, is shutting it’s own Google Code and moving to GitHub.

Run your own Git server

GitHub is a great service, however there are some limitations and restrictions, especially if you are an individual or a small player. One of the limitations of GitHub is that the free service doesn’t allow private hosting of the code. You have to pay a monthly fee of $7 to host 5 private repositories, and the expenses go up with more repos.

In cases like these or when you want more control, the best path is to run Git on your own server. Not only do you save costs, you also have more control over your server. In most cases a majority of advanced Linux users already have their own servers and pushing Git on those servers is like ‘free as in beer’.

In this tutorial we are going to talk about two methods of managing your code on your own server. One is running a bare, basic Git server and and the second one is via a GUI tool called GitLab. For this tutorial I used a fully patched Ubuntu 14.04 LTS server running on a VPS.

Install Git on your server

In this tutorial we are considering a use-case where we have a remote server and a local server and we will work between these machines. For the sake of simplicity we will call them remote-server and local-server.

First, install Git on both machines. You can install Git from the packages already available via the repos or your distros, or you can do it manually. In this article we will use the simpler method:

sudo apt-get install git-core

Then add a user for Git.

sudo useradd git
passwd git

In order to ease access to the server let’s set-up a password-less ssh login. First create ssh keys on your local machine:

ssh-keygen -t rsa

It will ask you to provide the location for storing the key, just hit Enter to use the default location. The second question will be to provide it with a pass phrase which will be needed to access the remote server. It generates two keys – a public key and a private key. Note down the location of the public key which you will need in the next step.

Now you have to copy these keys to the server so that the two machines can talk to each other. Run the following command on your local machine:

cat ~/.ssh/id_rsa.pub | ssh git@remote-server "mkdir -p ~/.ssh && cat >>  ~/.ssh/authorized_keys"

Now ssh into the server and create a project directory for Git. You can use the desired path for the repo.

git@server:~ $ mkdir -p /home/swapnil/project-1.git

Then change to this directory:

cd /home/swapnil/project-1.git

Then create an empty repo:

git init --bare
Initialized empty Git repository in /home/swapnil/project-1.git

We now need to create a Git repo on the local machine.

mkdir -p /home/swapnil/git/project

And change to this directory:

cd /home/swapnil/git/project

Now create the files that you need for the project in this directory. Stay in this directory and initiate git:

git init 
Initialized empty Git repository in /home/swapnil/git/project

Now add files to the repo:

git add .

Now every time you add a file or make changes you have to run the add command above. You also need to write a commit message with every change in a file. The commit message basically tells what changes were made.

git commit -m "message" -a
[master (root-commit) 57331ee] message
 2 files changed, 2 insertions(+)
 create mode 100644 GoT.txt
 create mode 100644 writing.txt

In this case I had a file called GoT (Game of Thrones review) and I made some changes, so when I ran the command it specified that changes were made to the file. In the above command ‘-a’ option means commits for all files in the repo. If you made changes to only one you can specify the name of that file instead of using ‘-a’.

An example:

git commit -m "message" GoT.txt
[master e517b10] message
 1 file changed, 1 insertion(+)

Until now we have been working on the local server. Now we have to push these changes to the server so the work is accessible over the Internet and you can collaborate with other team members.

git remote add origin ssh://git@remote-server/repo-<wbr< a="">>path-on-server..git

Now you can push or pull changes between the server and local machine using the ‘push’ or ‘pull’ option:

git push origin master

If there are other team members who want to work with the project they need to clone the repo on the server to their local machine:

git clone git@remote-server:/home/swapnil/project.git

Here /home/swapnil/project.git is the project path on the remote server, exchange the values for your own server.

Then change directory on the local machine (exchange project with the name of project on your server):

cd /project

Now they can edit files, write commit change messages and then push them to the server:

git commit -m 'corrections in GoT.txt story' -a
And then push changes:
git push origin master

I assume this is enough for a new user to get started with Git on their own servers. If you are looking for some GUI tools to manage changes on local machines, you can use GUI tools such as QGit or GitK for Linux.
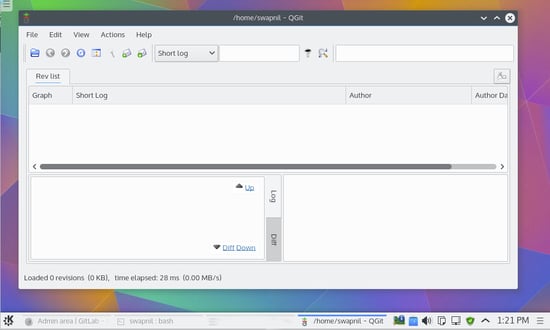
QGit

Us

15 August 2023

How to contribute to a software development on Git?

e.g.

1. Log in to GitHub, and on this project's page, click "Fork" to your own repository.
2. Clone your repository to your local machine: 

$ git clone https://github.com/xxx/Ansible-VIM-IDE.git

3. Add the original repository as the upstream branch on the master branch: 

$ git remote add upstream https://github.com/Hello-Linux/Ansible-VIM-IDE.git

4. Create a new development branch locally: 

$ git checkout -b dev

5. Make code changes and commit on the development branch: 

$ git add .

$ git commit -am 'xx change description'

6. Switch to the master branch and synchronize with the original repository: 

$ git checkout master

$ git pull upstream master

7. Switch to the dev branch, merge the local master branch (which is now synced with the original repository), resolving any conflicts if needed: 

$ git checkout dev

$ git merge master

8. Push the local dev branch to your remote dev repository: 

$ git push origin dev

9. On your GitHub repository page, click "Compare & pull request" to send a pull request to the original repository.

10. Wait for the original author's response (accept/reject).

02 April 2023

How to resolve merge conflicts in Git

https://stackoverflow.com/questions/161813/how-do-i-resolve-merge-conflicts-in-a-git-repository


Try:

git mergetool

It opens a GUI that steps you through each conflict, and you get to choose how to merge. Sometimes it requires a bit of hand editing afterwards, but usually it's enough by itself. It is much better than doing the whole thing by hand certainly.


As per Josh Glover's comment:

[This command] doesn't necessarily open a GUI unless you install one. Running git mergetool for me resulted in vimdiff being used. You can install one of the following tools to use it instead: meld, opendiff, kdiff3, tkdiff, xxdiff, tortoisemerge, gvimdiff, diffuse, ecmerge, p4merge, araxis, vimdiff, emerge.


Below is a sample procedure using vimdiff to resolve merge conflicts, based on this link.

  1. Run the following commands in your terminal

    git config merge.tool vimdiff
    git config merge.conflictstyle diff3
    git config mergetool.prompt false
    

    This will set vimdiff as the default merge tool.

  2. Run the following command in your terminal

    git mergetool
    
  3. You will see a vimdiff display in the following format:

      ╔═══════╦══════╦════════╗
      ║       ║      ║        ║
      ║ LOCAL ║ BASE ║ REMOTE ║
      ║       ║      ║        ║
      ╠═══════╩══════╩════════╣
      ║                       ║
      ║        MERGED         ║
      ║                       ║
      ╚═══════════════════════╝
    

    These 4 views are

    • LOCAL: this is the file from the current branch
    • BASE: the common ancestor, how this file looked before both changes
    • REMOTE: the file you are merging into your branch
    • MERGED: the merge result; this is what gets saved in the merge commit and used in the future

    You can navigate among these views using ctrl+w. You can directly reach the MERGED view using ctrl+w followed by j.

    More information about vimdiff navigation is here and here.

  4. You can edit the MERGED view like this:

    • If you want to get changes from REMOTE

      :diffg RE
      
    • If you want to get changes from BASE

      :diffg BA
      
    • If you want to get changes from LOCAL

      :diffg LO
      
  5. Save, Exit, Commit, and Clean up

    :wqa save and exit from vi

    git commit -m "message"

    git clean Remove extra files (e.g. *.orig). Warning: It will remove all untracked files, if you won't pass any arguments.

01 January 2022

How to amend older commit messages in git?

How to amend older commit messages in git?


https://git-scm.com/book/en/v2/Git-Tools-Rewriting-History


Changing Multiple Commit Messages

To modify a commit that is farther back in your history, you must move to more complex tools. Git doesn’t have a modify-history tool, but you can use the rebase tool to rebase a series of commits onto the HEAD that they were originally based on instead of moving them to another one. With the interactive rebase tool, you can then stop after each commit you want to modify and change the message, add files, or do whatever you wish. You can run rebase interactively by adding the -i option to git rebase. You must indicate how far back you want to rewrite commits by telling the command which commit to rebase onto.

For example, if you want to change the last three commit messages, or any of the commit messages in that group, you supply as an argument to git rebase -i the parent of the last commit you want to edit, which is HEAD~2^ or HEAD~3. It may be easier to remember the ~3 because you’re trying to edit the last three commits, but keep in mind that you’re actually designating four commits ago, the parent of the last commit you want to edit:

$ git rebase -i HEAD~3

Remember again that this is a rebasing command — every commit in the range HEAD~3..HEAD with a changed message and all of its descendants will be rewritten. Don’t include any commit you’ve already pushed to a central server — doing so will confuse other developers by providing an alternate version of the same change.

Running this command gives you a list of commits in your text editor that looks something like this:

pick f7f3f6d Change my name a bit
pick 310154e Update README formatting and add blame
pick a5f4a0d Add cat-file

# Rebase 710f0f8..a5f4a0d onto 710f0f8
#
# Commands:
# p, pick <commit> = use commit
# r, reword <commit> = use commit, but edit the commit message
# e, edit <commit> = use commit, but stop for amending
# s, squash <commit> = use commit, but meld into previous commit
# f, fixup <commit> = like "squash", but discard this commit's log message
# x, exec <command> = run command (the rest of the line) using shell
# b, break = stop here (continue rebase later with 'git rebase --continue')
# d, drop <commit> = remove commit
# l, label <label> = label current HEAD with a name
# t, reset <label> = reset HEAD to a label
# m, merge [-C <commit> | -c <commit>] <label> [# <oneline>]
# .       create a merge commit using the original merge commit's
# .       message (or the oneline, if no original merge commit was
# .       specified). Use -c <commit> to reword the commit message.
#
# These lines can be re-ordered; they are executed from top to bottom.
#
# If you remove a line here THAT COMMIT WILL BE LOST.
#
# However, if you remove everything, the rebase will be aborted.
#
# Note that empty commits are commented out


It’s important to note that these commits are listed in the opposite order than you normally see them using the log command. If you run a log, you see something like this:

$ git log --pretty=format:"%h %s" HEAD~3..HEAD
a5f4a0d Add cat-file
310154e Update README formatting and add blame
f7f3f6d Change my name a bit

Notice the reverse order. The interactive rebase gives you a script that it’s going to run. It will start at the commit you specify on the command line (HEAD~3) and replay the changes introduced in each of these commits from top to bottom. It lists the oldest at the top, rather than the newest, because that’s the first one it will replay.

You need to edit the script so that it stops at the commit you want to edit. To do so, change the word “pick” to the word “edit” for each of the commits you want the script to stop after. For example, to modify only the third commit message, you change the file to look like this:

edit f7f3f6d Change my name a bit
pick 310154e Update README formatting and add blame
pick a5f4a0d Add cat-file


When you save and exit the editor, Git rewinds you back to the last commit in that list and drops you on the command line with the following message:

$ git rebase -i HEAD~3
Stopped at f7f3f6d... Change my name a bit
You can amend the commit now, with

       git commit --amend

Once you're satisfied with your changes, run

       git rebase --continue


These instructions tell you exactly what to do. Type:

$ git commit --amend

Change the commit message, and exit the editor. Then, run:

$ git rebase --continue

This command will apply the other two commits automatically, and then you’re done. If you change pick to edit on more lines, you can repeat these steps for each commit you change to edit. Each time, Git will stop, let you amend the commit, and continue when you’re finished.


How to Remove all large files by a file extension name e.g. .mp4 or by file size from Every Commit in git?

How to Remove all large files by a file extension name e.g. .mp4 or by file size from Every Commit in git?

https://htmlpreview.github.io/?https://github.com/newren/git-filter-repo/blob/docs/html/git-filter-repo.html


09 July 2021

How to get lost files back resulting from running git add and git restore -s@ -SW?

 How to get lost files back resulting from running git add and git restore -s@ -SW?


Problem

suppose you ran

$ git add .

then you ran

$ git status

and saw that you have added some files which you did not want to add. 

(You did not run 

$ git commit

)

then you wanted to remove them from the index.

In haste, you ran 

$ git restore -s@ -SW

resulting in those files are gone away from your working tree (resulted from -W).

You want to get them back.

Solution:

Run

$ git fsck --cach --no-reflogs --lost-found --unreachable head

You will get a list of SHA1, which point to your lost files.

Then run

$ git show SHA1 > name_of_lost_file

one by one, every lost file will now be in your current work directory!


11 June 2021

How to create an alias command in git to display a log in graph?

How to create an alias command in git to display a log in graph?


$alias graph="git log --all --oneline --graph  --decorate"

(I find that it outputs the same as without '--decorate'.)

Note:

'--oneline' is a shorthand for both '--pretty=oneline' and  '--abbrev-commit' used together.

-----------------------------------------------------------------------------------------

I find the 2 following commands are very helpful,

1.

$git log --all --oneline --graph

2.

$git show-branch --all --more=1000

(you can replace 1000 with any number, according to your requirements.)

08 June 2021

How to undo (almost) anything with Git

How to undo (almost) anything with Git


https://github.blog/2015-06-08-how-to-undo-almost-anything-with-git/


checkout, reset, restore, revert, and switch. What do they really do?

 checkout, reset, restore, revert, and switch. What do they really do?

Written by torek, etc.


https://stackoverflow.com/questions/58003030/what-is-the-git-restore-command-and-what-is-the-difference-between-git-restor


The whole page is useful, especially from 'To add to VonC's answer, and bring into the picture all the relevant commands, in alphabetical order, I will cover:'

I also like -

$git restore -s@ -SW -- <file> 

above the aforesaid section.


07 June 2021

How to undo and redo in git?

 How to undo and redo in git?

For both undo and redo, use git reflog and git reset --hard head@{n}

You will find n in the result of git reflog.

06 June 2021

How to find what the git merge conflicts are?

 How to find what the git merge conflicts are?

After you run
$git merge <branch name 2>

If the merge failed, and it said that there was a conflict, the error message would tell you in which file the conflict was - 'Merge conflict in <file name>'.

Run -
$git diff <current branch name> <branch name 2> <file name>

you will get what the conflict is. Content in red is the change done in <current branch name>, and that in green is the change done in <branch name 2>.